Standard Testing for Metal Roofing – Part 1: Structural Performance and Uplift Resistance

When selecting a metal roofing product, there is an expectation that it will perform as intended over the life of the building. But what assures building owners, code officials, or design professionals that a product will in fact perform as promised? This question often comes up in building product discussions and the accepted way to answer it is to subject the products to physical testing. The type of testing is usually very specific to the product based on protocols and procedures developed by independent agencies such as Underwriters Laboratories (UL), ASTM International, or others. Manufacturers typically submit their products to independent testing labs who follow these standard test procedures. Once testing has concluded, they report the results back to the manufacturer. These results then show whether the product meets stated performance criteria or not. If not, the manufacturer can re-design and re-test until it does and then make the final results available to the public.

For metal roofing, a series of relevant and important tests are typically performed. In this blog, we will look at two of them related to structural performance and wind uplift.

ASTM E1592

The structural integrity of metal roofing is crucial given the various natural forces that can be imposed on the materials. Effects from wind, snow, or other conditions can compromise its integrity. Accordingly, the ASTM Committee E06 on Performance of Buildings (including sub-committee E06.57 on Performance of Metal Roof Systems) has developed ASTM E1592 “Standard Test Method for Structural Performance of Sheet Metal Roof and Siding Systems by Uniform Static Air Pressure Difference”. While the standard acknowledges the use of computation (i.e. calculations) to determine the basic structural capacity of most metal products, it also points out that some conditions are outside of the scope of computational analysis and hence need to be tested.

The standard describes a test method with “optional apparatus and procedures for use in evaluating the structural performance of a given (metal) system for a range of support spacings or for confirming the structural performance of a specific installation”. As such, it is very specific both to metal roofing and its installation. This test method uses imposed air pressure not to look at air leakage but simply to determine structural reactions. It consists of three steps:

1. Sealing the test specimen into or against one face of a test chamber

2. Supplying air to, or exhausting air from, the chamber at the rate required to maintain the test pressure difference across the specimen

3. Observing, measuring, and recording the deflection, deformations, and nature of any failures of principal or critical elements of the panel profile or members of the anchor system

The test needs to be performed with enough variation to produce a load deformation curve of the metal and account for typical edge restraint (fastening) representative of field conditions.

Manufacturers need to submit different products that are tested at least once at two different span lengths between supports. Standing seam roof panels are typically tested at a 5’-0” and 1’-0” span. Spans between the two tested spans can be interpolated. The result is a table of tested loading results that can be compared to code required or engineered design loading to then determine if the selected material and spacing are adequate for the project needs or if another product or spacing is needed.
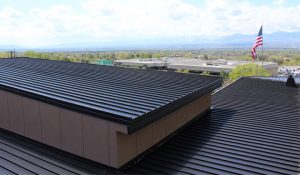
MBCI's metal roofing products undergo a series of tests to ensure maximum resistance and performance.
MBCI’s metal roofing products undergo a series of tests to ensure maximum resistance and performance.

UL 580

The ASTM E1592 test is focused on the structural integrity of metal panels. It also uses positive and negative air pressure in a static (i.e. non-moving) condition to determine performance. There is also a separate concern about how metal roofing will perform in a dynamic condition as would be expected in a windy condition where wind gusts can ebb and flow erratically. In that regard, a separate test developed jointly between Underwriters Laboratories (UL) and the American National Standards Institute (ANSI) looks at the ability of roofing to resist being blown off a building due to wind. Known as ANSI/UL 580 “Standard for Tests for Uplift Resistance of Roof Assemblies”, it has become the recognized means to identify and classify the suitability of roofing for different wind conditions – low to high.

This test is also specific in its scope and intent stating that it “evaluates the roof deck, its attachment to supports, and roof covering materials”. It also points out that it is not intended to test special roof conditions, main or secondary structural supports, or deterioration of roofing. The standard prescribes in considerable detail the type of test chamber that needs to be constructed and used for the testing which includes three sections: “a top section to create a uniform vacuum, a center section in which the roof assembly (i.e. deck, attachment, and roofing) is constructed, and a bottom section to create uniform positive pressure”. The test procedure is then based on placing the roof assembly into the test chamber and subjecting it to a prescribed sequence of 5 phases of oscillating positive and negative pressure cycles (simulating dynamic wind conditions) over 80 minutes of total testing.

There are four wind uplift classifications obtainable for a tested assembly based on the test assembly retaining its attachment, integrity and without any permanent damage. These include Class 15, Class 30, Class 60, and Class 90. Each class has its own requirements for test pressures with increasing pressure as the class number increases. Higher class numbers indicate increasing levels of wind uplift resistance. Note, that to obtain a Class 60 rating, the tested assembly must pass the Class 30 test then be immediately subjected to the Class 60 test sequence. Similarly, to obtain a Class 90 rating, the tested assembly must first pass both the Class 30 and 60 tests. Metal roofing manufacturers who want their roofing products tested and classified under UL 580 must pair them with standard roof deck and fastening materials. Hence most have many different tests performed and results reported accordingly.

When reviewing metal roofing options, it is comforting to know that most manufacturers have tested their products and designed them to meet or exceed minimum requirements. To find out more about tested results of products you may be considering, contact your local MBCI representative or see the MBCI website and select the “testing” tab under a selected product.
Sealing the Deal: The Importance of Properly Sealing the Building Envelope Using IMPs and Single-Skin Panels

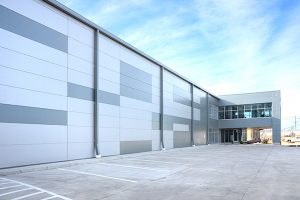
The primary purpose of a building’s envelope (roof and walls) is to protect the building’s interior spaces from the exterior environment and provide the desired exterior aesthetics. Whether choosing insulated metal panels (IMPs) for their superior performance or, instead, looking to the wide range of aesthetic choices available with single-skin panels—or some combination of the two—the common goal must always be to protect the building from the potential ravages of water, air, vapor, and thermal/heat. By ensuring proper installation of metal panels and, thereby, properly sealing the building envelope, problems can be mitigated, efficiencies maximized, and the integrity of the building protected.

Here, we’ll briefly consider the benefits of each panel, and some key considerations relative to their sealant needs and capabilities.

Insulated Metal Panels (IMPs)

IMPs are lightweight, composite exterior wall and roof panels that have metal skins and an insulating foam core. They have superior insulating properties, excellent spanning capabilities, and shorter installation time and cost savings due to the all-in-one insulation and cladding. In effect, IMPs serve as an all-in-one air and water barrier, and are an excellent option for retrofits and new construction. With their continuous insulation, roof and wall IMPs provide performance and durability, as well as many aesthetic benefits.

IMPs offer excellent R-value and improve energy efficiency to the building envelope.

Generally speaking, because of the nature of the joinery, it is easier to get a good seal in place with IMPs given their relative simplicity (i.e., putting the two pieces together with the sealant). They require great attention, though, in terms of air and vapor sealing—aspects largely controlled by the installers on a given project. As an example, vapor sealing in cold climates or applications is critical to the overall soundness of a building. Consider the damage a building could incur if moisture seeps into a panel and becomes trapped; it if freezes, it could push panels out of alignment. This would result in not just an unattractive aesthetic, but a performance failure as well. In order to be effective, all sealant and caulking must be fully continuous.

Single-Skin Panels

Single-skin panels, alternatively, offer the advantage of an expansive array of colors, textures and profiles. They are also thought to have more “sophisticated” aesthetics than IMPs. Single-skin panels are available in both concealed fastener and exposed fastener varieties, and are part of an assembly. They can be used alone or in combination with IMPs, and as long as the needed insulation is incorporated, single-skin panels can meet technical and code requirements, depending on the application. Single-skin products offer a wide range of metal roof systems and wall systems as well.

Getting the proper seal on single-skin panels may require extra sealants or closures, and have more parts and pieces that have to come together to create the seal. However, when properly installed and sealed, they can provide excellent performance in their own right. Some key caveats include ensuring panel laps are properly sealed with either tape or gun butyl sealants, and carefully inspecting air and water barriers for proper installation as well as penetrations through the wall for sealing/fire caulking prior to panel.

In most cases, following the details for the most common conditions will give you a successful and high-performing outcome.

Regardless of the type of metal panel used, taking the time and effort to ensure the sealing and caulking details are properly handled, metal buildings can protect the built environment and provide long-lasting quality and performance.

The Case for Day One Weathertightness Warranties

Once upon a time, a “standard warranty” was indeed the industry standard for weather tightness warranties in the metal roofing realm. To make a long story short, this meant that manufacturers supplied a “manufacturer’s standard warranty” based on an initial review of the details to ensure that the roof could be properly installed but left it up to others to ensure that the details were followed. If the roof was not properly installed and resulted in a leak then the manufacturer’s warranty did not cover it. At this point, the project had been closed out and the installer was long gone, sometimes even out of business. The owner, architect, general contractor, installer and manufacturer were then at odds with each other leading to dissatisfaction and frustration all around.

Warranty Evolution

In the mid ’90s, the Single Source or Day One warranty was born and quickly caught on throughout the metal roofing industry. Generally, this warranty required that the roofing contractor come to the manufacturer’s training course to be trained in the proper installation of their roof system(s). In addition, the manufacturer typically required inspections at the beginning, middle of the roof installation with a final inspection just before the crew demobilized from the project. Once the warranty was issued, the manufacturer was responsible to the building owner from the date of substantial completion for the weathertightness of the roof. To be sure, there are still terms and conditions to the warranty, just like with any type of product warranty. For instance, the warranties don’t cover leaks caused by natural disasters or damage caused by other trades on the roof. These warranties provide very good coverage and the best part is that the inspections greatly reduce the chance of a leak in the first place, which is what any building owner would want.

Warranties
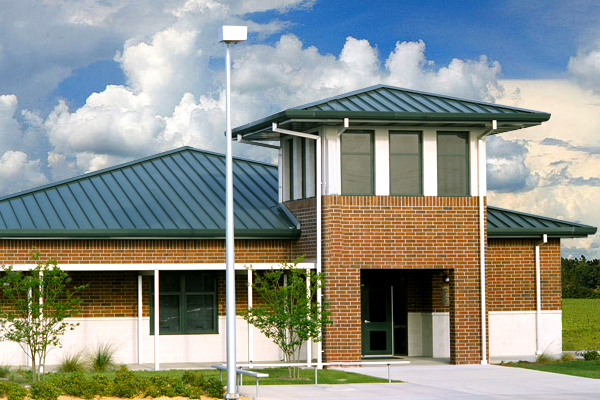
Chain of Lakes Elementary School featuring Hunter Green SuperLok® Metal Panels

There is an overwhelming agreement on all sides that the evolution toward the Day One warranty has been a good thing for the industry. It has forced installers to do things right from the outset and has compelled manufacturers to come up with good, clear details for some of the more complex architectural elements that architects want to use such as dormers, hips, etc.

Conclusion

Manufacturers all want their roof installations to go smoothly, to look good, be trouble-free and perform as expected for many years. To that end, they are willing to work with specifiers, roofing contractors and others to provide assistance, training and job specific help as needed. To ensure that the roofs are properly installed, the specifiers and contractors need to work together with the manufacturers to ensure good communication about the requirements for the specific project and what each party needs to make the project successful.

Nice Curves! Stunning Architecture with Curved Roofing and Walls

Breaking away from simpler panels, more and more architects are experimenting with arched and curved metal roofing and wall panels to upgrade their designs. This enables designers to incorporate exciting elements like concave and convex curving, not as feasible with other cladding materials.

Combined with unique angles, increased edge finishing options, appealing gutter options and greater compatibility with shingle types, architects now have access to a greater assortment of mix-and-match options.

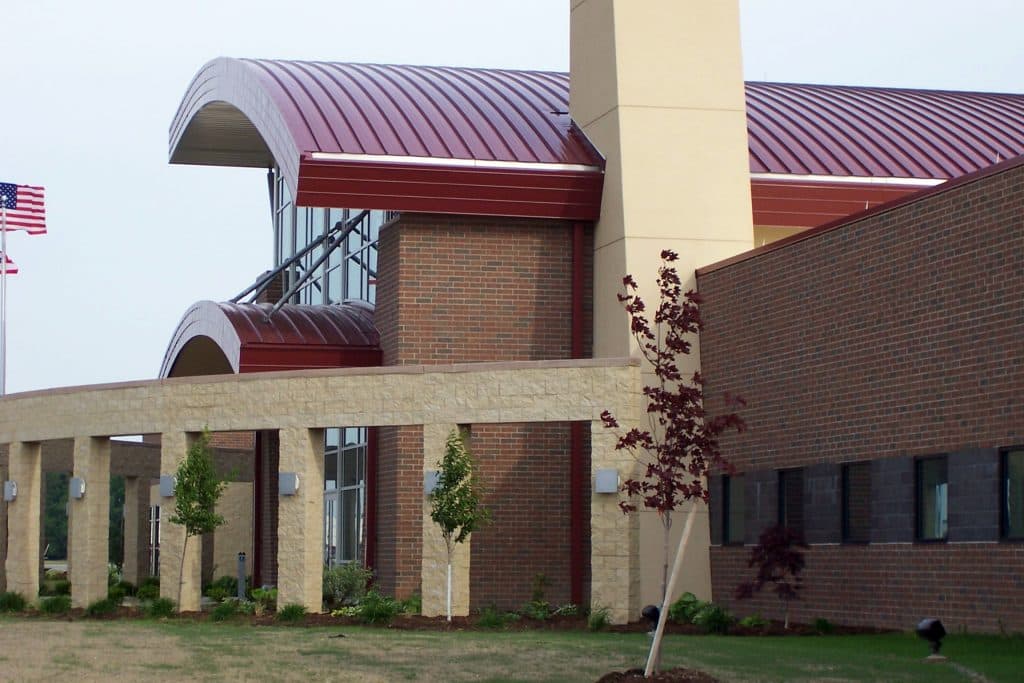
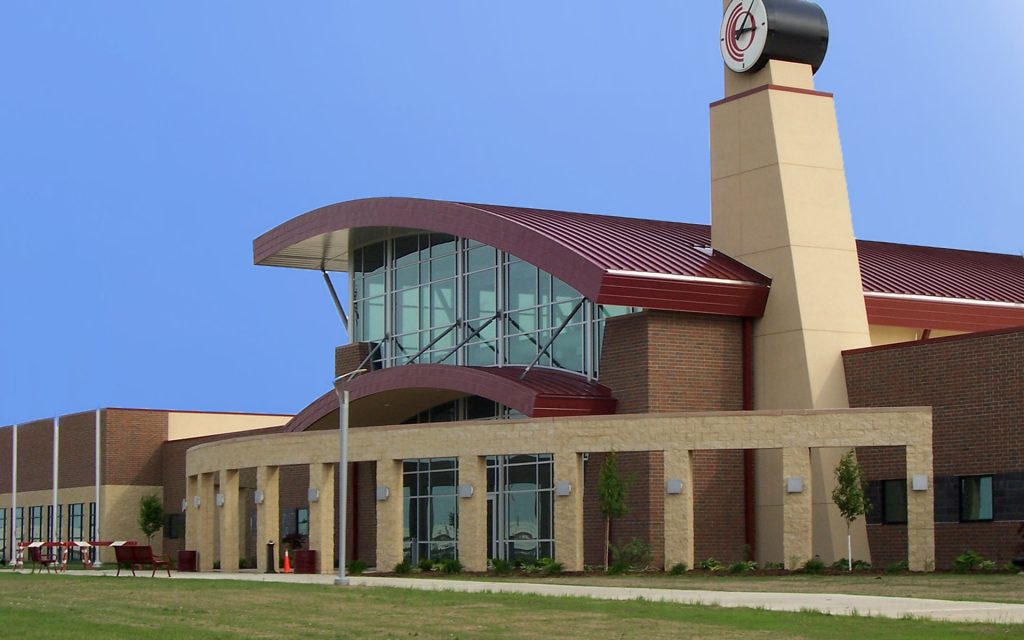
For example, at Owens Community College in Findlay, Ohio, a regal red, double-curved canopy crowns the curtainwall with 15,500 square feet of 22-gauge curved metal roof panels. Designed by Rooney Clinger Murray Architects, the structural roofing panel system, fabricated by MBCI, is ASTM tested for air infiltration and water penetration, and incorporates a 2-inch tall standing seam that was field seamed during the installation process. The contractor, Charles Construction Services, won the American General Contractors (AGC) Build Ohio Award for “New Construction Under $10 Million.”

Owens Community College
For Owens Community College, the Curved BattenLok® metal panels in red accentuate the arch of the campus, making it the focal point of the building.

Another noteworthy curved design example is the Central Los Angeles Area High School #9, designed by HMC Architects. “Metal enabled us to clad buildings of different geometries, including curved geometries, in one material, while also giving them a special appearance,” reported Kerstin Kohl, spokesperson for the project’s design architect, COOP HIMMELB(L)AU, in a Metal Construction Association case study, Steeling Art for Students.

Using CAD and BIM for Curved Metal Panels

For designing and fine-tuning curved metal creations, the latest CAD and BIM features are key tools for architects.

In creating the “geometry that has been freed from the relentlessness of the orthogonal layout,” as described by Mark Dewalt, AIA, principal at Valerio Dewalt Train, in a recent article in Metal Architecture magazine, New Trends in Metal Architecture, designers are using CAD in shop drawings to support unique façade fabrication.

“The use of computer design to warp and twist and perforate will give metal greater longevity, added Kevin Marshall, AIA, LEED AP BD+C, associate architect, Integrated Design Solutions.

Similarly, BIM software is further supporting enhanced compatibility with metal roof and wall designs with newer features such as automated light gauge steel wall framing work and the ability to more easily configure supporting structures, openings, complex L or T connections and service hole positions while providing photorealistic renderings so that the client can see exactly how their building will look once built.

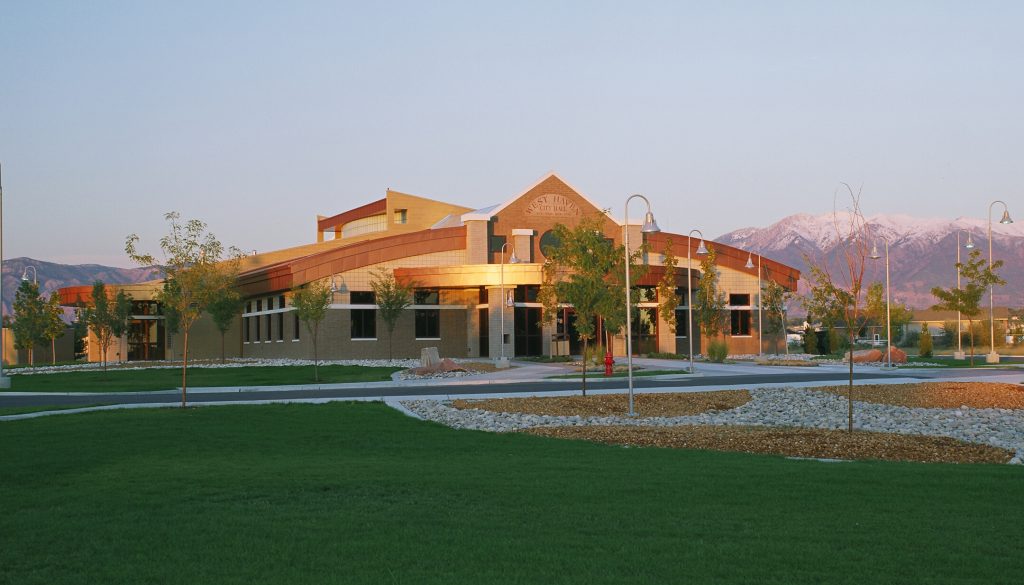
West Haven City Hall
West Haven City Hall combines MBCI’s Curved BattenLok® in Copper Metallic with Artisan® Series and Flat Sheet.

Ensuring a Tight Building Enclosure with Curves

As with any roofing type, designing and installing a tight building enclosure for curved roofing and walls is essential for delivering a high performing building.

For starters, architects must choose an appropriate vapor retarder, especially in cooler climates and interior relative humidity levels of 45 percent or greater. Also, buildings with high humidity interiors and construction elements that may release moisture after the roof is installed–such as interior concrete and masonry, plaster finishes and fuel-burning heater– require special considerations when choosing vapor retarders.

With utility clips, some curved panels will lay tight to the wood deck, but if tin tabs are used to attach the moisture barrier to the wood deck, then they will need to be covered to prevent the tabs from rusting the back side of the panels. Similarly, plastic washers may not be the best option as they run the risk of impacting the panels, resulting in undesired aesthetics. Rather, peel and stick membranes are a preferred underlayment because they eliminate the potential of underlayment fasteners penetrating or dimpling the panels.

A Savvy Look for Design

Whether it’s wavy, circular or some other exciting soft geometric shape, curved metal roofing and walls open up all kinds of new design possibilities. Out of the box, literally, architects are actively producing exciting, eye-catching creations with these welcomed capabilities.

Choosing the Right Type of Standing Seam Roof (SSR)

When it comes to specifying standing seam roofs, one type doesn’t fit all. While a standing seam metal roof system can be one of the most durable and weather-tight roof systems available in the industry, its benefits can be negated if you fail to understand the details in application parameters of the specific system. Do your research, though, and for your next design that requires an aesthetically pleasing and structurally sound metal roofing system, you can choose with confidence the standing seam metal roof system that suits your project to a tee.

How to identify a good standing seam roof system

A good standing seam roof system is one that can satisfy both the project’s specific design criteria and adhere to building code standards. Standing seam profiles can include those that are utilitarian or architectural in nature, are of numerous widths and profiles and have varying seam joinery (e.g., snap or field seamed).

Why specify a standing seam metal roof system

When properly installed, standing seam metal roof systems are an extremely effective and long-lasting material choice. Key advantages include:

  • Weather-tight roofing system
  • Can be engineered to withstand high winds (150 mph and higher)
  • Class A Fire-resistance rating from UL
  • Class 4 Impact-resistance rating from UL
  • Long service life—up to 60 years
  • Lightweight
  • Special clips designed to accommodate thermal roof expansion and contraction and various thicknesses of fiberglass insulation

Matching the roof system to the project

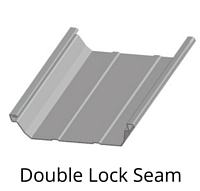
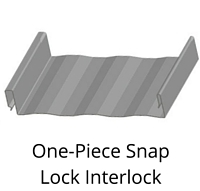
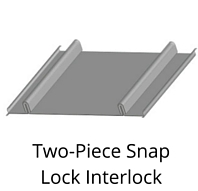
In basic terms, there are four unique styles of metal standing seam panels: Double lock seam, symmetrical seam, one-piece snap-lock interlock and two-piece snap-lock interlock. These styles can be further delineated by seam shape or profile, i.e. trapezoidal rib, vertical rib, square rib and tee rib. The choice of the rib profile, as well as the rib spacing is generally an aesthetic preference of the designer. Knowing which style will best suit a given situation will help ensure a successful installation.

Popular Standing Seam Metal Panels

Double Lock Standing Seam
Shown: MBCI Double-Lok®

One-Piece Snap Lock Interlock Standing Seam
Shown: MBCI LokSeam®

Two-piece Snap Lock Interlock Standing Seam
Shown: MBCI Craftsman™

Some criteria to consider are roof slope, roof run (distance from eave to ridge), weather conditions (such as ice or snow) and architectural features, i.e. hips, valleys, dormers, parapet walls, etc.

For instance, if your project has a roof slope of 1/2:12 you will need to ensure the product being installed is approved for this low pitch. In this case, you would likely use a “double lock” or mechanically “field-seamed” panel. You also want to ensure that all details are able to provide for a weather-tight seal even if temporarily submerged during a heavy rain. Field-seamed panels are also the best choice in areas that experience heavy ice and snow.

Additionally, it is imperative to recognize complicated design details that should be carefully specified and reviewed regardless of the roof slope. Design conditions that require special attention include: roof transitions, dead valleys, dormers, eave offsets, ridge offsets and offsets in parapet walls.

It cannot be overstated that you should always consult a metal roofing manufacturer about the capabilities of the standing seam metal roof system, including what warranties are available, prior to specifying it.

Browse the standing seam product manual for more information.

Design and testing

Familiarize yourself with wind uplift testing as prescribed by Underwriters Laboratories (UL-90 – 580 Test) and ASTM E-1592.

Storms and Safety: Metal Building Systems, Standing Strong

durable metal roof
Brester Construction features eco-FICIENT Royal panels

Welcome to hurricane season, says NOAA! Erika was a near miss, and Henri went off to sea, but with multiple storms stirring up the Pacific and a major El Niño threatening severe weather this year, building teams are focused on resilient, high-performance envelope and roofing assemblies.

The Durability of Metal Roofs

Resiliency is the watchword, and the stringent Miami-Dade County code language or similar standards are being adopted in many communities. The Florida Building Commission, as well as FEMA and NIST, have done studies of building performance during severe storms, and metal buildings were shown to perform exceptionally well. According to MBMA reports, insulated metal panels (IMPs) perform well under stresses of high winds and projectiles such as hail and wind-borne debris.

The post-storm studies everywhere from Texas to New Jersey confirmed the durability and resistance to driving rain and severe pressure differentials, too. Standing-seam roof systems and IMP façades remained intact during Katrina even as winds hit 120 mph. According to Metal Roofing Alliance, “metal roofing can have a 140-mph wind rating, meaning it can withstand wind gusts up to 140 miles per hour.” MBCI, which has achieved these ratings, has also pointed to another critical standard: wind uplift testing in accordance with Underwriters Laboratories’ UL 580, Standard for Tests for Uplift Resistance of Roof Assemblies.

Performance During Storms

Detailing of the roof-wall interface is essential to protecting against uplift. To reduce damage from wind-driven rain, manufacturers like MBCI use test protocols from Miami-Dade or the ICC (TAS No. 100-95). These standards show the security and integrity of the seams in IMP and metal roofing systems. For hail and wind-driven projectiles, the metal systems often are able to absorb impact and remain functional and retain their protective metal layers intact even if they may suffer cosmetic damage, as MetalRoofing.com forums have shown. Last, IMPs and metal roofing systems perform very well during lightning strikes — a fact that is counter intuitive but proven. In fact, use of metal roofs does not increase the chance of a lightning strike, as scientific studies show and the Metal Construction Association reported in BD+C, and as you can read more about in our blog post.

Similar to the three pigs of fable, some buildings will do well through hurricane season, while others nearby will suffer from softer connections, more porous materials and less stringent assembly designs. Many building owners will do well with metal roofing and vertical assemblies: with rugged embossed metal sandwiches over high-R-value, rigid insulation, held firmly in place with interlocking joints or lapping seams.

Best of all, the systems are complete assemblies that install as weather-tight barriers without coordinating various components and trades. They also have higher rated values than, for example, EIFS planks or fiberglass panels, some of which may suffer lost R-value when wet. With these benefits – and following the damage and disruptions caused by Hurricanes Katrina and Sandy in the United States – metal is an attractive roofing choice for weather resistance.

Best Applications for Water Barrier Standing Seam Metal Roof Panels

We discussed water shedding standing seam metal roofs in my last post, and the fact that despite their water shedding properties, you still really must guard against water infiltration. Today I’ll discuss water barrier roof systems, which are structural standing seam roofing systems. These panels can withstand temporary water immersion over the panel seams and end laps. They normally have factory applied mastic in the seams to insure weather integrity. End laps, when needed, are installed using high quality tape and/or bead sealant supplied by the manufacturer. The trim designs used with these systems are much more water resistant as well.Water barrier SSR

The advantage these water barrier SSRS systems offer:

  • They require no deck. This is a tremendous savings on the in-place roof cost.
  • Many systems can be installed on roof slopes as low as ¼:12. This allows greater design flexibility and can also save on the in-place roof cost.
  • Because they are the only thing between the interior of a building and the weather, these are the most tested metal roof systems available. Manufacturers spend a lot of time and money testing these systems for air and water intrusion, dead load, wind uplift and fire.

Water barrier SSRSs can be further divided by seam type—trapezoidal or vertical rib.

Trapezoidal systems usually have a rib height of 3 inches. The most common panel width is 24 inches, although some manufacturers offer them in other widths as well. Trapezoidal systems are traditionally thought of as commercial or industrial standing seam systems. They are used on warehouses, factories and buildings where the roof is not meant to be seen from the ground. However, some designers have taken these systems and incorporated them into architectural applications with stunning results.

But be careful. Trapezoidal rib systems are much harder to seal at hips and valleys than vertical rib systems. The outside closures at the hip must be cut on a compound bevel with a trapezoidal system. At a valley, the panels are harder to seal because they require an inside closure; the vertical rib panels do not.

Vertical rib systems have traditionally been thought of as non-structural. However, there are now many vertical rib systems available that can span purlins or joists. These systems are available in a wide variety of panel widths, ranging from as little as 10 inches to as much as 18 inches wide. Rib heights vary from 1 foot to 3 feet.

Vertical rib systems are usually easier to install than the trapezoidals. There are fewer parts to the typical vertical seam system, which makes for a simpler, quicker installation. Because there are no inside closures, valleys are much easier to seal and quicker to install. Hips are easier to seal because the outside closures can be cut quickly and simply from a stock length of zee closure.

For these reasons, the vertical rib systems are often a better choice for applications on high-end architectural roofs. Ask just about any metal roof installer, and he will tell you that he prefers the vertical rib system over the trapezoidal system in this application.

Bottom line, when selecting a roof system, choose function first, then aesthetics.  When you use the wrong roof system for a given function, the installation process becomes complicated, and results less than ideal. With so many great metal roof options, don’t make life more complicated and uncertain than it need be.

And to make things simple, safe and sound, choose from MBCI’s array of metal roofing system products. Find out more.

Best Applications for Water Shedding Standing Seam Metal Roof Panels

A standing seam roof system, or SSRS, has exposed fasteners only at the eave and at specially designed end laps. The concealed clips installed at the panel seam typically allow the panel to float during thermal movement. These systems are normally manufactured in 24 gauge, though 22 gauge is often used.

People tend to classify SSRS as either structural or architectural, but those two distinctions aren’t absolute. There are many architectural SSRS that are structural systems, and most structural SSRS can be used in an architectural application. I think the better distinction is that SSRS are either water shedding or water barrier systems.

Water Shedding SSRSs

Water shedding panel systems are architectural SSRS, meaning they rely on gravity to shed water from the roof before it can build up on the metal panels. The steeper the roof slope, the faster the water will run off. However, in certain instances, these roofs still may allow water to infiltrate.

The following precautions can be taken to avoid this:

  1. Water shedding panel systems must be installed on a minimum roof pitch of 3:12 or greater. Panel manufacturers typically advertise the minimum recommended slope for each of their products.
  1. They must be installed over a solid deck, since they are not structural panels.
  1. The deck must be covered with a moisture barrier or membrane. This is critical as the moisture barrier is the last line of defense once water gets under the metal roof panels. The industry standard for years has been #30 felt. I think this should be considered the absolute minimum.

    A better, though more expensive solution is to use a peel and stick membrane. These are much more tear resistant and they will self-seal to nails and screws. Check with the membrane manufacturer about ventilation requirements as these membranes can trap moisture in the attic space if it is not well ventilated.

  1. Keep the design simple. Because these roofs only shed water, intricate trim details are usually not as watertight as those used with water barrier systems. Valleys, hips and other architectural effects can certainly be utilized, but with them comes a much greater chance for water intrusion.

Next post, I’ll get into the applications for water barrier standing seam roof systems

A standing seam metal roof system from MBCI is one of the most durable and weathertight roof systems available in the industry. So when your design requires a roofing system that is both aesthetically pleasing and structurally sound, choose one of MBCI’s six standing seam metal roof systems. Read more.


Details, Details, Details

Water runs downhill.  And, gravity is our friend.  Yet sometimes we forget these basic concepts when installing metal panel roofing.

When it comes to metal roofing details, a contractor should always think about the flow of water.

Roofing contractors are in the business of controlling water, so let’s install details that allow water to run downhill and let’s use gravity to our advantage.  A more precise way to say it: Implement drainage details that don’t buck water!

Details, details, details

Defending Against Water Leaks

Metal roof penetration and edge details should not rely on sealant as the primary defense against water leaks.  Certainly, sealant is and should be used as a secondary measure against water leaks.  Consider this: A transverse panel seam is created by lapping the upper panel over the lower panel, and sealant is used as a secondary seal.  Installers would never reverse the lap of a transverse seam (where the lower panel is on top of the upper panel), bucking water and relying only on sealant to keep water out.  A penetration detail (e.g., a vent stack or roof curb) should use the same logic.  There’s no doubt that bad details are rooted in low cost and speed of installation, but those are not details that are going to have equal service life to the metal panels on a roof.  A penetration detail is as critical to the long-term success of a metal roof as a transverse seam.

Prefabricated Penetration Details

It’s best to use prefabricated penetration details that have welded or soldered weathertight seams.  The prefabricated piece should be the width of a panel and include the male and female seams, and be seamed into the adjacent panels.  And just like a typical transverse seam, the top edge of the prefabricated piece should be under the upper panel, and the bottom edge of the prefabricated piece should be above the lower panel.  Water is not bucked and seams are fully intact.  That is a long-term penetration detail.

Where proper overlap can’t happen, redundancy is necessary.  A small pipe penetration detail should use a rubber roof jack with added levels of redundancy for weatherproofing.  First, the roof jack should only be installed in the flat of the panel; sealant tape should be installed between the panel and the roof jack; and closely spaced, gasketed fasteners should be installed to create compression on the sealant.

Roofing That Lasts

Metal roofs sell themselves because metal is long-lasting.  And construction details need to be developed and installed with that in mind.  Metal panels don’t leak—the joinery and fastener locations can leak.  Remember to design and build details that have equivalent service life to the panels themselves.  Proper laps are critical, and remember, gravity is our friend.

To learn how to design a roof system that prevents possible infiltration and allows for proper water runoff, take MBCI’s AIA-accredited course, The Devil is in the Details.

Find a sales representative