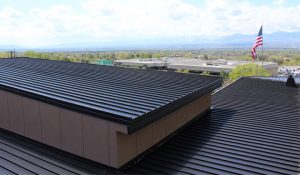
Are Metal Panels An Ideal Low-Slope Roofing Material?

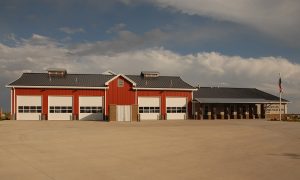
Many large, commercial, low-rise buildings often don’t benefit from steeply-sloped roofs the way residences and small commercial buildings might. This is because a steep roof slope would add unwanted height and unnecessary construction cost. Buildings like warehouses, retail stores, etc. are more appropriately built with low-slope roofing, commonly known as “flat roofs”. The National Roofing Contractors Association (NRCA) defines low-slope roofs as those with “a slope at or less than 3:12″. Anything steeper qualifies as a “high-slope roof”. With this in mind, let’s look at some key points to consider when designing and constructing a low-slope roof.

MBCI Low-Slope Roofing

 Low-Slope Roofing Materials

When it comes to selecting low-slope roofing products, there are generally three fundamental choices:

  • Asphalt/ Bituminuous Products: The traditional commercial roofing norm for many years, the use of asphalt/bituminous products has dwindled as newer, more appealing options have emerged.
  • Flexible Membrane Roofing: This roofing material can be made from a variety of types of plastic/polymer-based materials (commonly known as EPDM, TPO, PVC, etc.). Rolls of the chosen membrane are laid out on the roof structure and secured in place either with mechanical fasteners (screws with large washers) or with a continuous layer of adhesive.
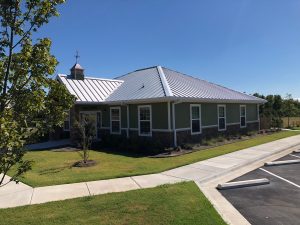
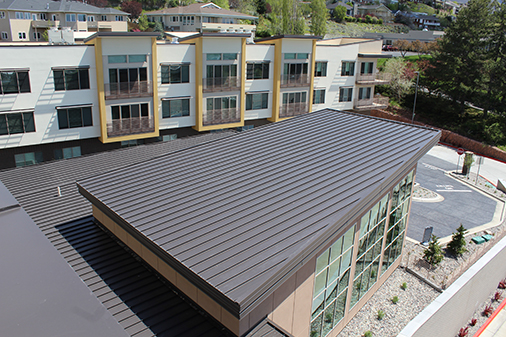
  • Metal Roofing: Sometimes overlooked, metal roofing is suitable for different roof slopes. Many metal roofs that use standing-seam systems are rated for use with a pitch as low as ½:12.

When considering which type of roofing material to use for a building project, there are a number of significant differences that illustrate why metal roofing is often the ideal choice.

Engineered For Superior Performance

Standing-seam metal roofing is made specifically for use on low-slope roofs as it meets a number of performance requirements:

  • Water resistance: Precipitation doesn’t penetrate through metal or through the standing seams where the metal panels join together. This is why they can tolerate such low slopes, allowing the water to drain away slowly and predictably without leakage.
  • Rigidity: The rigid nature of metal means that there is less opportunity for ponding (standing water). This is not always the case with asphalt/bituminous or membrane roofing systems.
  • Drainage: Metal roofs carry water to the building’s edge toward gutters and downspouts that carry it away from the building. Other roofing systems rely on drainage piped inside the building. This takes up space and has the potential to leak water inside the building and cause damage.
  • Wind Resistance: Standardized uplift testing shows that metal roofing performs as well or better in extreme weather than mechanically-fastened or fully-adhered membrane systems.
  • Durability: The most cited advantage of metal roofing is its long-term strength and durability. Engineered design and use of high-quality coatings ensures a longer lifespan—50 years or more. In contrast, other roofing types typically feature lifespan ratings of 20 or 30 years.
  • Puncture Resistance: Low-slope metal roofing is more puncture-resistant than asphalt/bituminous or membrane roofing. This makes it better able to tolerate foot traffic, hail and other puncture-inducing hazards.
  • Construction/ Installation Ease: Metal roofing panels are custom-made to suit specific building sizes and end uses. This customization typically means it takes less time to place and install metal roofing in the field. Further, metal panels can tolerate a wide range of temperatures and weather conditions and still install and perform as intended. Low-slope roofs are also safer to walk on with less risk of slips, falls and other hazards.

Cost-Effectiveness

Using metal roofing on low-slope roofing systems can be cost effective in a number of ways:

  • Fewer labor hours as a result of the ease of installation saves money during construction.
  • Competitive material costs, particularly if the metal roofing is part of a total metal building package from a single manufacturer.
  • Minimal maintenance requirements and aversion to rusting, mold growth and decay that save the building owner money over time.

This all adds up to a very favorable life-cycle cost.

The performance, cost-effectiveness and life-cycle benefits of metal roofing panels make them a viable option for low-slope roofing systems. Manufacturers like MBCI can help you select the right metal roofing products and provide information and resources to help ensure proper installation.

View examples of low-slope metal roofing projects and contact your local MBCI representative to start your project today.
Metal Roof Seaming: Best Practices for Ensuring Weathertight Seams

It would seem logical that the most important field installation process for a standing-seam metal roof is the actual process of creating the weathertight seams that connect the metal panels together and ensures the structural integrity of the roof. Perhaps for many different reasons, however, this critical seaming process is not always given the proper attention it deserves, nor are installers given the proper training required to ensure installation runs smoothly. This approach can cause some serious issues, not the least of which is the voiding of a manufacturers warranty or the discovery of roof leaks and the resulting damage.

To help, here are some best practices for readily and successfully carrying out the metal roofing seaming process:

MBCI Blog Image_Seaming_062019_00_in post_reduced

Personnel

Because of the critical nature of seaming metal roofs, the crew members doing this work should be properly trained. Team members who will be performing this work should not perform the seaming without having participated in the appropriate installation training required to ensure the seaming process is appropriately managed. Most roofing manufacturers offer installation training that many installers take advantage of—and this training opportunity should be taken advantage of by the staff who will be doing the seaming.

Seaming Equipment

It is very important that the seaming equipment being used is matched to the specific roof panel system being installed. Manufacturers routinely rent out this equipment in order to be sure that the metal panel profiles are installed properly and are not compromised through the use of generic equipment or that of another manufacturer. Using the wrong equipment can end up being costly for everyone if panels and seams are ruined in the process.

 Hand Crimper

As metal panels are set in place, they are often secured with metal clips, spaced according to engineering and construction needs. Hand crimpers are used to form the seams around the clips as well as any end laps. This process must not be overlooked as improper hand tooling is the number one cause of faulty seaming. To ensure costly mistakes aren’t made, follow the process described in the “Field Seaming Tool Manual”. This manual should be provided with the equipment and reviewed in training.

Electrical Sources

The next step will involve the use of an electric seamer which obviously needs a source of electricity to operate. However, not just any electrical power source will do. Almost all professional seamers have an AC/DC motor that will require 10 or 15 amps and 120 volts. A dedicated electrical circuit—preferably from a temporary electrical pole or an existing building electrical panel—is the best and most reliable way to go. A generator with 15 amp capacity dedicated to be used only for the seamer (in order to avoid power surging) may be acceptable as well. In either case, the power line to the seamer needs to be 10-gauge (minimum) cord. It should also be no more than 200 feet long (to avoid power drop).

Electrical power sources that are NOT acceptable include outlets from a powered man lift or a generator that is not dedicated to only the seamer. (This includes a generator that is part of a welding machine.) Check the manufacturer’s requirements for any other restrictions that can damage the seamer. Skipping this step can place the responsibility for repair or replacement onto the installer.

Electric Seamer

Once all panels are in place, the hand crimping is done and the power source is set. Then, electric seaming takes care of finishing the roofing system. Again, consult the seamer manual for proper procedures, including which direction the seaming should be done. (Seaming can either be done up or down the roof depending on direction of roof installation.) The electric seamer includes a switch for the operator to control the starting and stopping of the process.

On low-slope roofs, the operator should walk alongside the seamer to be sure nothing is in its path and that the seam is done properly. While stopping and re-starting is fine, the seamer should never be removed in the middle of a seam. Doing this makes it very difficult to set it back in exactly the same spot again. If something appears to be wrong with the seamer or the seams being produced, then don’t keep using it. There is no point in damaging multiple roof panels if any one panel indicates that things aren’t going right. In this case, contact the manufacturer right away for assistance or replacement of the seamer.

Safety

Electrical seamers are heavy and—if not used and secured properly—can cause harm or injury. Therefore, they should always be tied off with a safety line—the same type used for workers—not a common rope and definitely not the electrical cord. The safety line should be properly secured to the seamer and then attached to something rigid on the building. Never attach this to a person who could be pulled off of a roof by it.

Cleaning

Before use each day, check the electric seamer and remove any oils, debris or dirt. Make sure the seamer is unplugged from the electrical power source before you begin cleaning. Also, check the grease level in the machine daily and only add a little bit  (2-3 pumps from a grease gun) as needed. Too much will cause the grease to leak out onto the roofing.

Following these pointers should help assure the safe and efficient use of the right seaming equipment when installing roofing panels. To find out more about proper seaming or to schedule training, contact your local MBCI representative.

Understanding LEED for Green Metal Buildings

Designing and constructing sustainable buildings has become a mainstream expectation of most building owners. Whether for reduced energy costs, higher returns on investment, or as an organizational philosophy, “green” building solutions are in demand. Perhaps the best known and most often cited program to achieve these goals is the US Green Building Council’s (USGBC’s) LEED® rating system. While some may think that green buildings are more complicated and costly to build, that is not actually the case. This is especially true when metal building materials are used. In fact, metal buildings are an ideal and economical way to pursue sustainability goals and LEED certification. How? We break it down as follows:

LEED

The LEED® Program

The LEED program has been in use since 1998 and is now used worldwide. It is a voluntary, point-based rating system that allows for independent review and certification at different levels. These levels include Certified (40-49 points), Silver (50-59 points), Gold (60-79 points), or Platinum (80 or more points). Since it allows for choices in which points are pursued, innovation and flexibility are entirely possible as long as specific performance criteria are met. It also encourages collaborative and integrative design, construction and operation of the building.

Points are organized into six basic categories, many of which can be addressed through metal building design and construction, as summarized below.

  • Location and Transportation: Metal buildings can be manufactured and delivered to virtually any location. That means they can support LEED criteria for being located near neighborhoods with diverse uses, available mass transit, bicycle trails, or other sustainable amenities. Metal building parking areas can also be designed to promote sustainable practices for green vehicles and reduced pavement. This all contributes toward obtaining LEED eligibility.
  • Sustainable Sites: Adding a building to any site will certainly impact the natural environment already there. Delivering portions of a pre-engineered metal building package in a sequence to arrive as needed means that the staging area on-site can be minimized—reducing site impacts. Additionally, using a “cool metal roof” has been shown to reduce “heat island” effects on the surrounding site and also qualify for LEED.
  • Water Efficiency: Any design that reduces or eliminates the need for irrigation of plantings and other outdoor water uses is preferred. Incorporating metal roofing with gutters and downspouts, as is commonly done on metal buildings, allows opportunities to capture rainwater for irrigation or other uses. It also helps control water run-off from the roof and assists with good storm water control.
  • Energy and Atmosphere: Metal buildings can truly shine in this category. Creating a well-insulated and air-sealed building enclosure is the most important and cost-effective step in creating an energy conserving building. A variety of insulation methods for metal building roof and wall systems are used to achieve this. Typically, metal building construction uses one or more layers of fiberglass insulation and liners combined with sealant and air barriers. Alternatively, insulated metal panels (IMPs) provide all of these layers in a single manufactured sandwich panel with impressive performance. Windows, skylights and translucent roof panels can provide natural daylight, allowing electric lighting to be dimmed or turned off. For buildings seeking to generate their own electricity,  standing-seam metal roofing provides an ideal opportunity for the simplified installation of solar photovoltaic (PV) systems. Metal roofs generally provide a sustainable service life in excess of 40 years. This means they can outlast the PV array, thus avoiding costly roof replacements during most PV array lifespans.
  • Materials and Resources: Life Cycle Assessments (LCAs) are recognized by LEED as the most effective means to holistically assess the impacts that materials and processes have on the environment and on people. Fortunately, the Metal Building Manufacturer’s Association (MBMA) has collaborated with the Athena Sustainable Materials Institute and UL Environment to develop an industry-wide life cycle assessment report. There is also an Athena Impact Estimator that can help with providing LEED documentation. Metal buildings support exceptional environmental performance through the significant use of recycled steel and the reduced need for energy intensive concrete due to lighter weight buildings.
  • Indoor Environmental Quality: Most people spend much more time indoors than outside, which impacts human health. Therefore, LEED promotes or requires using materials that don’t contain or emit harmful substances. It also promotes design options for natural daylight, exterior views and acoustical control to promote psychological and emotional well-being. Metal buildings are routinely designed to readily incorporate components that help achieve these indoor qualities.

In addition, some LEED points are available for demonstrating innovation and addressing priorities within a geographic region.

Considering the qualities listed above, metal buildings clearly provide a prime opportunity to pursue LEED certification at any level. To find out more about the LEED rating system, visit https://new.usgbc.org/leed. To find out more about successfully designing and constructing metal buildings pursuing LEED certification, contact your local MBCI representative.

Advances in Ordering Metal Building Products Online

You’ve heard it before: “Online is the way of the future!” but do online solutions really meet the demands of traditional building? In recent blog posts, we’ve outlined the general benefits of using an online ordering platform to order metal building products. These include the customized metal roof and wall panels and trim MBCI offers. Beyond basic ordering functionalities (which are must-haves for an effective tool), there are additional features that manufacturers can incorporate to save you time and help you effectively build your projects when ordering metal online.

Web


Time-saving features that improve ordering metal online include:

  • Copying and Merging Online Carts: Sophisticated online ordering tools now feature the ability to copy previously-created quotes, quote templates and/or orders. Once copied and/or merged, you can then modify item attributes like color and gauge to suit your preferences. These tools can also feature the ability to merge all items from several sources into a single, combined cart.
  • Consolidated Carts: Some online ordering tools take care to consider not just the actual tool functionality, but the experience people have when using it. Part of this is ensuring users can  quickly and easily view order details. Enhanced online ordering websites are attempting to achieve this by grouping like-products together—thus reducing the number of pages included for each quote or order. This not only cuts down on the amount of scroll time needed to view an entire quote or order, but enables you to quickly and easily see the most important details.
  • Changing Multiple Items at Once: Large quotes and orders often require that the same specifications apply across a series of different items. For example, you may want the same panels but in a different color, texture or  thickness. Likewise, you may even want to remove entire product types (like panels or trim). Instead of modifying cart items one at a time, you can now change to several products at once.
  • Complete Building Assemblies: Ordering metal online helps make getting the products you need easier and faster. But what if you know what you want to build, but aren’t sure about all the products you’ll need to get the job done? Online ordering tools like MBCI’s now provide a selection of “Building Assemblies” that group all products needed to complete a project into single, pre-defined bundles.These complete product assemblies allow you to put all the metal building products you need for an entire building into your online ordering cart with just a few clicks of your mouse. In addition to saving time and effort, these assemblies can include warranty protection if all other conditions are met. Note that it’s also possible to remove specific products (like fasteners, sealant, etc.) if you already have them.
  • Account Management Improvements: Controlling who can place orders has been a key benefit of many online ordering systems. However, based on customer feedback, MBCI has overhauled this part of our tool, making it much easier for your organization’s designated account administrator to add and modify users, as well as set access and spending limits and track user activity within the system. Overall, these seemingly basic improvements allow you to more effectively manage your business.
  • View All Quotes and Orders: Common to many e-commerce sites, only the user who creates the quotes and/or orders generated through their account can see them. However, because most organizations rely on several people collaborating to best service their customers, more sophisticated capabilities are required. New features now allow your company’s online account administrator to grant multiple users access to view quotes and orders while controlling the level of detail shared. This allows your team access to the information they need to effectively do their jobs while also protecting sensitive details at your discretion.

Industry-first features like these further support building contractors, project managers and suppliers in meeting the needs of their customers and clients when ordering metal online. MBCI has recognized the value tools and features like these can provide. As more people shift toward ordering metal online, we aim to continue enacting improvements that positively impact the overall MBCI ordering process.

To find out more about ordering metal online, including how to price, quote and place orders, visit http://www.mbci.com/shop or contact your local MBCI representative  today. To be the first to know when we launch new time-saving enhancements to our online ordering tool, stay tuned to our blog, email and social media posts.

Choosing Metal Roofing Types

All metal roofing is not the same. There are different profiles in different shapes for different reasons and to suit different performance needs. How to choose? Here’s the process that metal building engineers go through at MBCI to zero in on the most economical selection that will still meet the performance requirements of a particular metal roof project.

Snap Together Trapezoidal Panels

Offered by MBCI under the name Ultra-Dek®, the trapezoidal shape is among the best for channeling water off of the roof. However, because of this shape, it is most appropriate for typical sloped roofs with single plane roofs areas free of valleys or hips. It’s snap together installation makes it quick and easy to install economically with wind resistance capabilities adequate for many situations. It also carries basic air leakage and water penetration testing approvals.

Mechanically Seamed Trapezoidal Panels

For roofs that require a higher degree of performance than snap together systems can provide, MBCI Double-Lok® panels can be considered. The mechanically field-seamed, trapezoidal legs provide higher wind and water resistance with test results to satisfy UL-90, FM ratings, and Miami Dade County approvals. This makes them ideal for many industrial, commercial, and architectural roofs without hips and valleys that are subject to higher wind and rain demands. While the material cost for the panel is the same as for the Ultra-Dek®, there is more labor cost due to the mechanical field-seaming compared to the snap together installation. The Double-Lok® panel is also used often for retrofit installations over pre-existing metal roofs either to update the roof or to provide additional insulation. In either case, there is no need to disrupt the existing roofing or structure below allowing for a very cost-effective solution. Check with MBCI on the details of how to properly do a retrofit with these panels though to be sure things work out as intended.

Vertical Legs with Mechanical Seams

BattenLok
Regardless of which metal roofing type you choose, they all use high grade steel in standard gauge thicknesses and can be specified in many colors.

In cases where the trapezoidal legs aren’t appropriate or desired, then vertical leg, standing seam metal panels are the next logical choice. The MBCI BattenLok® HS system uses 2” tall legs that are mechanically field-seamed once along each panel joint to create a high strength, structural standing seam roof system that can be installed directly over purlins or bar joists – no additional solid substrate is required. It is also capable of transitioning from roof to fascia with the use of accessory seam covers.

Double Seamed Vertical Legs

In cases where very rigorous weather conditions may be encountered, the MBCI SuperLok® roof panels provide the highest degree of roof performance. While the manufactured SuperLok® roof panel is essentially the same as the single seamed BattenLok® panel, the profile is modified slightly to allow for standing seams to be rolled over twice, thus creating a stronger, thicker seal between adjacent panels. Once again, there is no difference in the material cost between the two, but the added field-seaming step will obviously add to the labor cost of this roof choice. Nonetheless, that can be a small price to pay for the higher performance and added peace of mind that the system offers.

While we have pointed out the differences between these four different metal roofing choices, note that there are some basic similarities too. They all use high grade steel in standard gauge thicknesses and they can all be specified in the same wide choice of colors. They are all offered in multiple panel widths, although check with the manufacturer to be sure the width you prefer is available for the specific panel selected. They all can be used for low slope applications down to ¼” per foot except for the retrofit solution which requires a 3:12 pitch. Finally, they all do have some minor variations in the profile which can help with the final desired appearance of the finished roof on the building.

To find out more about the differences in roof deck types and how to choose the best ones for on a metal roof that you are involved with, contact your local MBCI representative, and sign up for our newsletter to subscribe to our blog.


Appropriate Standing Seam Clips for Roof Panels

Part of the beauty and appeal of standing seam metal roofs is that the fasteners holding the metal panels in place are concealed. That gives the roof its clean, continuous appearance that is often desirable, but it also avoids the issue of potential roof leaks around exposed through-fasteners. Concealed fastening doesn’t mean that there aren’t any fasteners, though, it just means they are installed out of sight – underneath the panels. The industry standard approach is to use a metal clip that fits over the edge of a panel and that is secured with a screw type fastener to the structure or substrate below. Then it is covered by an adjacent panel or trim. The important thing to know is that not all panel clips are made the same – for good reasons.

What determines the type of panel clip to use? Here are the most common things to keep in mind:

The Manufacturer

Each manufacturer of metal roofing typically has a range of metal panel types, profiles, and brands that have their own traits and characteristics. As such, they need clips to match and fit with the manufactured panels. Hence, the first place to start with panel clip selection, is for the roofing manufacturer to be clear on the options and choices available that are compatible with their roofing products.

Building Size and Type

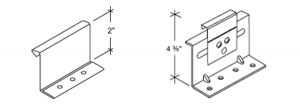
Fixed clips (left) and floating clips (right) are two of the most commonly used types of clips.
Fixed clips (left) and floating clips (right) are two commonly used types of clips.

Manufactured metal buildings that include metal roofing commonly use very predictable, coordinated systems. Accordingly, a standard, one piece, “utility clip” is commonly used, primarily for snap together roof panels, on metal buildings that do not exceed certain widths causing undue expansion and contraction. One piece clips allow the roofing panels to expand and contract within the clip profile, but there are limits based on the amount of movement tolerated. Alternatively, in projects where the roofing is attached to something other than a metal building frame or where standing seams are used to secure the panels together, it is advisable to use a two-piece or “floating” clip. In these cases, a base piece is secured to the structure or substrate and the clip fits both into the base and over the roofing panel where it is seamed or folded into the vertical leg of the panel. Using this approach, the clip expands and contracts directly with the metal panel thus moving across the base and keeping the roofing attached.

Insulation

Roof insulation comes in different thicknesses, appropriately so for different climate zones and different roof designs. Since energy codes require at least some of the insulation to fit between the underside of the metal roofing panel and the structure (i.e. above the metal roofing purlins), the metal panel clip needs to be the right height to reach the full height of the insulation up to the top of the roof panel. Hence, manufacturers offer different sizes and heights of panel clips designed to work with different heights of insulation. In many cases, they also recommend the use of a thermal spacer underneath the clip to separate it thermally from the steel structure below. Note that the thermal spacer thickness is dependent on the insulation thickness over the steel purlin only, not the thickness of any insulation under the purlin.

A certified installer should install your standing seam roof to ensure proper installation of clips.

Other Factors

The panel clips connect the roof panels to the roof structure, so they need to be installed in a manner that allows them to do that job under normal and demanding circumstances. The driving issue in this case is not keeping the panel down, but preventing it from blowing off in a strong wind. Therefore, a structural engineer or other design professional may need to determine the proper spacing of the clips, the type and size of fasteners (i.e. screws) to use, or similar important details. Similarly, the proper installation of clips so that they seat and nest the way they are intended, means that qualified and certified installers / erectors should be used. In this way, roofing crews with the needed experience and training can help assure that the whole roofing system, including the panel clips, are installed properly.

To find out more about the most appropriate panel clips to use on a metal roof that you are involved with, contact your local MBCI representative.

A Guide to Selecting the Right Metal Roof Panel

With the great variety on the market, one of the main questions we, as metal roof panel manufacturers, get from customers is “How do I select the right panel for my project?” The answer can generally be found by examining a number of criteria, including the properties of the roof, the region and climate, geometry, slope, warranty type…among other key factors.

Here we will provide a brief overview of the various factors that should be considered when narrowing down the choices.

Determining Factors

Slope-BattenLok
Steep slope roofs will usually be more expensive than low-slope roofs, but steep slope roofs have the ability to prevent ponding water and have higher snow loads.

1. Slope— Slope is the first consideration as just this one aspect will eliminate certain panels, making it easier to narrow down options right from the start. The two types of roof slopes are low slope and steep slope.

  • A low-slope roof, commonly found in commercial applications, is one whose slope is less than 3:12. The benefits include a simpler geometry that is often much less expensive to construct, and the requirement of fewer materials than a steep slope, thereby reducing material costs.
  • A steep slope roof, more common in residential construction, is one whose slope is greater than 3:12. Steeper slopes are ideal for areas that have higher snow loads and will also prevent the possibility of ponding water on the roof. Since the roof is a visible part of the structure, choosing a metal roof for residential construction often skews more toward aesthetic considerations.

2. Location/Climate— The location and climate of the project is a factor, specifically when looking at certifications/regulatory product approvals, which will limit the panels you can you use within specific regions. This is most relevant to Dade County, the state of Florida, and the Texas Coast, as well as certain snow regions.

3. Specified test standards—Often times, you may need to specify UL 580 or Factory Mutual Insurance Design.

4. Engineering Design—Due to the roof pressure acting on the buildings, engineering design factors eliminate some products because they’re simply not strong enough. This is an area that needs true technical expertise. For that reason, make sure to get a professional engineer to design the roof system in order to determine the correct panel for the project. Also, check with the manufacturer to determine if they have panels that have been tested to certain test standards. If they do not have the testing on a product, that in itself can exclude a particular panel.

5. Geometry—In its most basic terms, roof geometry is an overview of what the finished roof will look like, including special conditions, such as hips, valleys and ridges. The various conditions that go along with specific roof types will determine if a roof geometry is simple or complicated—which will affect the type of panel that can—and can’t—be used. For instance, a Double-Lok® roof panel can be used on a low slope roof—it can go down to 1/4:12. However, if a low roof slope condition has a valley, you may want to avoid a Double-Lok® panel since this product is more difficult to use in a valley situation.

Standing Seam - LokSeam
The LokSeam® roof pictured above is a standing seam roof, one of the two main types of roof systems.

6. Panel type— Panel types can be broken out into two main types: standing seam and through-fastened. The choice of specific product within these general categories depends on a number of considerations, including aesthetics and weathertightness warranties. If your project calls for either standing seam OR through-fastened, that will eliminate about half the types right off the bat.

  • Standing Seam Roof Systems
    In basic terms, there are four unique styles of metal standing seam panels: Double lock seam, symmetrical seam, one-piece snap-lock interlock and two-piece snap-lock interlock. These styles can be further delineated by seam shape or profile, i.e. trapezoidal rib, vertical rib, square rib and tee rib.
  • Through-Fastened Roof Systems
    Exposed, or through-fastened panels, are available in a variety of widths, usually from two to three feet wide. They also come in various rib shapes, heights and spacings. Typical gauges are 29 and 26, but they also come in 24 and 22 gauge. There are also structural and non-structural through-fastened panels. Structural panels are capable of spanning across purlins or other secondary framing members such as joists or beams. Non-structural panels must be installed over a solid deck. Through-fastened roofs are best suited to small- and medium-sized metal buildings and residential applications. In both instances, the panel runs are limited to shorter lengths where thermal movement is typically not a problem.

7. Substrate— Examples of substrates are open framing, plywood, and metal deck. Some panels can’t be attached, for instance, to open framing but almost every type of panel can attach to plywood.

8. Required Weathertightness Warranties— If a weathertightness warranty is a requirement, your options are down to the only panels offered with that guarantee—eliminating all the through-fastened panels.

Looking to the Manufacturer for Help

While specifiers need to take that initial look at all the determining factors, the choices can still feel overwhelming. Once you’ve eliminated the panels that surely won’t work, you will still likely be left with many strong choices. The metal panel manufacturer can guide you to that decision. We encourage you to contact the MBCI team of experts to help further narrow down the choices in order to finalize what is the best metal roof panel for your project. For more guidance on finding the right roof panel for your project, stay tuned for our white paper coming soon.

Preventing Roof Damage from Rusted Fasteners

These days, the majority of metal roofs are made from Galvalume coated steel, which typically carry a warranty against perforation due to rusting for a period of 20 years. A study on Galvalume standing seam roofs (SSR) conducted at the behest of the Metal Construction Association (MCA) showed that a properly installed Galvalume SSR can be expected to last 60 years or more.  However, the caveat is “properly installed”. One of the major issues that will drastically reduce the service life of a Galvalume-coated roof is the use of non-long-life fasteners in exposed locations.

Anytime you have an exposed fastener on a metal roof, you risk rust—the term commonly used for the corrosion and oxidation of iron and its alloys. While a little rust might not seem like a big deal, its presence can actually be a harbinger of severe damage to your metal roof panels if not caught early, or ideally, stopped before it ever has a chance to start.

The issue is most prevalent on R-panel roofs due to the use of exposed fasteners. And even with standing seam roofs, which use clips and are typically referred to as a concealed fastener roofs, there are exposed fasteners as well, most often at the eave, the end laps and at trim, such as ridge flash, rake trim, and high-eave trim.

Prevention

The best recommendation for any exposed fasteners (meaning they are exposed to the weather and other harmful elements), is that they should be long-life fasteners. When you don’t use long-life fasteners, they start rusting with exposure to moisture and, over time, the rust virus stretches down to the roof, causing severe and often irreparable damage.

Suppose you have a metal roof that is 10 to 15 years old. Depending on the environment, the roof could be in excellent shape—except for where those screws are; you can have holes right through the roof at the fastener locations. More people than ever are starting to realize they’re supposed to use a long-life fastener, in a case like this. We see a lot of roofs when we inspect them for weathertightness warranties. What often happens is a worker on the roof may have just grabbed some screws that were handy without thinking about the kind of screw or the inevitable chemistry that could potentially cause rusting. Or, you may have a situation where there is some type of accessory put on the roof by another trade, perhaps a plumber or an HVAC installer—and maybe they didn’t use long-life fasteners.

The best recommendation to mitigate this potential problem is two-fold. First, make sure roofing installers know to use a long-life fastener at every exposed location. Secondly, make sure that every other contractor working on the roof that you’re responsible for knows to use long-life fasteners with whatever they’re doing.


Fasteners
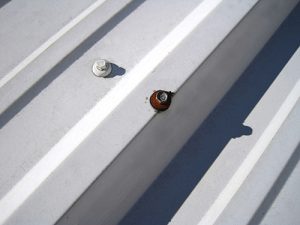
A long-life fastener (left) can withstand the elements and prevent rust buildup longer than other fasteners. A regular fastener (right) will begin to rust upon exposure to moisture.

What if rust does occur?

One question frequently asked is: if the fasteners do become rusty, do you have to replace all the panels? If you catch the problem before the rust virus makes its way down to the roof itself, you can just change out the screws. However, if the rust has compromised the roof, you very likely would have to change out all the panels, at the least everything that has been affected—just because of one little spot. Truthfully, if the rust is in one spot, it’s probably all over.

Another thing worth mentioning is if aluminum panels are used along with typical long-life fasteners, it could still rust, especially if the roof is exposed to salt spray (think close to the coast).  The answer in this case is to use a stainless steel screw, which are long-life fasteners (but not all long-life fasteners are stainless steel).

Be aware from the start.

It’s crucial for installers and contractors to take notice and order the right fasteners from the start so that problems can be avoided.

Also, after some wear and tear, if subsequent work is done on the roof, everyone involved should take note. For instance, you buy a building and somewhere down the road you decide to frame out a small office and add a bathroom. You’d need a water heater, so a plumber goes on the roof, puts in pipe penetration and doesn’t use long-life fasteners. The onus would be on the owner to ensure that everyone performing work on that roof—no matter when—is using long-life fasteners.

Conclusion

The best-case scenario with a metal roof is to get the right fasteners to begin with. However, if the roof is already installed, the next step is to be on the lookout for rust and if you notice it, consider that it might be because of the fastener.

If that’s the case and you catch it early—when it’s just the screws that are rusting but the rust virus hasn’t yet transferred down onto the roof, you can just change out the screws with the proper long-life fasteners. We recommend doing a roof inspection at least once a year. If you see any loose or rusty screws, replace as needed.

For more information on MBCI’s broad selection of metal roof and wall panels, contact your local MBCI representative.

Standard Testing For Metal Roofing – Part 2: Air and Water Resistance

In a prior post, we discussed the importance of independent (i.e. third party) standardized testing as a means of verifying the performance of metal roofing, and specifically looked at structural and wind uplift performance. In this post, we will similarly look at testing standards but focus on metal roofing tested for air leakage and water penetration.

Air Leakage and ASTM E1680

Keeping air from passing through a building system from the exterior to the interior (i.e. drafts) is a fundamental role of any building envelope system, including roofing. It is also important in controlling the flow of harmful airborne moisture into a roof assembly. Hence, testing a roofing panel for its ability to control air leakage is critical to the long-term success of the roofing system, and ultimately, the building.

ASTM E1680 “Standard Test Method for Rate of Air Leakage Through Exterior Metal Roof Panel Systems” is used to determine “the resistance of exterior metal roof panel systems to air infiltration resulting from either positive or negative air pressure differences”. It is a standard procedure for “determining air leakage characteristics under specified air pressure differences”. The test is applicable to the field portion of any roof area including panel side laps and structural connections but not at openings, the roof perimeter, or any other details. The test is also based on constant temperature and humidity conditions across the roofing specimen being tested to eliminate any variation due to those influences.

The standard test procedure consists of “sealing and fixing a test specimen into or against one face of an air chamber, supplying air to or exhausting air from the chamber at the rate required to maintain the specified test pressure difference across the specimen, and measuring the resultant air flow through the specimen”. Basically, the test is meant to reveal the ability of the selected roofing panel to resist the difference in air pressure between the two sides and thus demonstrate its air tightness.

The beauty of this standardized test is that different metal roofing products can be tested under the same conditions and compared. The standard calls for a pressure differential between the two sides of positive and negative 1.57 foot pounds of pressure per square foot of panel (75 paschals of pressure) and can be tested in the negative pressure mode alone if the roof slope is less than 30 degrees from horizontal.

MBCI's metal roofing products are tested to confirm airtightness and water permeability.
MBCI’s metal roofing products are tested to confirm an air tight and water-resistant roof.

Water Penetration and ASTM E1646

In addition to air leakage, water leakage in roofing systems is obviously not desired. To test the performance of metal roofing products in this regard, ASTM E1646 titled “Standard Test Method for Water Penetration of Exterior Metal Roof Panel Systems by Uniform Static Air Pressure Difference” is the norm. This standard laboratory test is not based solely on free running water, but on water “applied to the outdoor face simultaneously with a static air pressure at the outdoor face higher than the pressure at the indoor face, that is, positive pressure”. This pressurized testing is intended to simulate wind-driven rain and flowing water that can build a head as it drains. The test measures the water-resisting properties of the roofing in the field of the roof panels including panel side laps and structural connections. Just like air testing, it does not include leakage at openings, perimeters, or other roofing detail areas.

The test method itself consists of “sealing and fixing the test specimen into or against one face of a test chamber, supplying air to or exhausting air from the chamber at the rate required to maintain the test pressure difference across the specimen, while spraying water onto the outdoor face of the specimen at the required rate and observing any water leakage”. Hence, it requires the air and water to be supplied simultaneously and for the testers to observe and document the rate of water leakage under the test conditions.

The test parameters typically require at least 20 gallons of water per hour (gal/hr) overall with between 4 – 10 gal/hr in any quarter section of the tested specimen, all at specified air pressure differentials. Given that this is a fairly stringent test, it is fair to say that metal roofing that holds up under these test conditions will likely perform well under most weather conditions when installed on a building. Typically, manufacturers have developed metal roofing products with seaming and connection methods that allow them to pass this test with virtually no observable water penetration.

To find out more about the tested results of metal roofing products you may be considering, contact your local MBCI representative or see the MBCI website and select the “testing” tab under a selected product.

Standard Testing for Metal Roofing – Part 1: Structural Performance and Uplift Resistance

When selecting a metal roofing product, there is an expectation that it will perform as intended over the life of the building. But what assures building owners, code officials, or design professionals that a product will in fact perform as promised? This question often comes up in building product discussions and the accepted way to answer it is to subject the products to physical testing. The type of testing is usually very specific to the product based on protocols and procedures developed by independent agencies such as Underwriters Laboratories (UL), ASTM International, or others. Manufacturers typically submit their products to independent testing labs who follow these standard test procedures. Once testing has concluded, they report the results back to the manufacturer. These results then show whether the product meets stated performance criteria or not. If not, the manufacturer can re-design and re-test until it does and then make the final results available to the public.

For metal roofing, a series of relevant and important tests are typically performed. In this blog, we will look at two of them related to structural performance and wind uplift.

ASTM E1592

The structural integrity of metal roofing is crucial given the various natural forces that can be imposed on the materials. Effects from wind, snow, or other conditions can compromise its integrity. Accordingly, the ASTM Committee E06 on Performance of Buildings (including sub-committee E06.57 on Performance of Metal Roof Systems) has developed ASTM E1592 “Standard Test Method for Structural Performance of Sheet Metal Roof and Siding Systems by Uniform Static Air Pressure Difference”. While the standard acknowledges the use of computation (i.e. calculations) to determine the basic structural capacity of most metal products, it also points out that some conditions are outside of the scope of computational analysis and hence need to be tested.

The standard describes a test method with “optional apparatus and procedures for use in evaluating the structural performance of a given (metal) system for a range of support spacings or for confirming the structural performance of a specific installation”. As such, it is very specific both to metal roofing and its installation. This test method uses imposed air pressure not to look at air leakage but simply to determine structural reactions. It consists of three steps:

1. Sealing the test specimen into or against one face of a test chamber

2. Supplying air to, or exhausting air from, the chamber at the rate required to maintain the test pressure difference across the specimen

3. Observing, measuring, and recording the deflection, deformations, and nature of any failures of principal or critical elements of the panel profile or members of the anchor system

The test needs to be performed with enough variation to produce a load deformation curve of the metal and account for typical edge restraint (fastening) representative of field conditions.

Manufacturers need to submit different products that are tested at least once at two different span lengths between supports. Standing seam roof panels are typically tested at a 5’-0” and 1’-0” span. Spans between the two tested spans can be interpolated. The result is a table of tested loading results that can be compared to code required or engineered design loading to then determine if the selected material and spacing are adequate for the project needs or if another product or spacing is needed.

MBCI's metal roofing products undergo a series of tests to ensure maximum resistance and performance.
MBCI’s metal roofing products undergo a series of tests to ensure maximum resistance and performance.

UL 580

The ASTM E1592 test is focused on the structural integrity of metal panels. It also uses positive and negative air pressure in a static (i.e. non-moving) condition to determine performance. There is also a separate concern about how metal roofing will perform in a dynamic condition as would be expected in a windy condition where wind gusts can ebb and flow erratically. In that regard, a separate test developed jointly between Underwriters Laboratories (UL) and the American National Standards Institute (ANSI) looks at the ability of roofing to resist being blown off a building due to wind. Known as ANSI/UL 580 “Standard for Tests for Uplift Resistance of Roof Assemblies”, it has become the recognized means to identify and classify the suitability of roofing for different wind conditions – low to high.

This test is also specific in its scope and intent stating that it “evaluates the roof deck, its attachment to supports, and roof covering materials”. It also points out that it is not intended to test special roof conditions, main or secondary structural supports, or deterioration of roofing. The standard prescribes in considerable detail the type of test chamber that needs to be constructed and used for the testing which includes three sections: “a top section to create a uniform vacuum, a center section in which the roof assembly (i.e. deck, attachment, and roofing) is constructed, and a bottom section to create uniform positive pressure”. The test procedure is then based on placing the roof assembly into the test chamber and subjecting it to a prescribed sequence of 5 phases of oscillating positive and negative pressure cycles (simulating dynamic wind conditions) over 80 minutes of total testing.

There are four wind uplift classifications obtainable for a tested assembly based on the test assembly retaining its attachment, integrity and without any permanent damage. These include Class 15, Class 30, Class 60, and Class 90. Each class has its own requirements for test pressures with increasing pressure as the class number increases. Higher class numbers indicate increasing levels of wind uplift resistance. Note, that to obtain a Class 60 rating, the tested assembly must pass the Class 30 test then be immediately subjected to the Class 60 test sequence. Similarly, to obtain a Class 90 rating, the tested assembly must first pass both the Class 30 and 60 tests. Metal roofing manufacturers who want their roofing products tested and classified under UL 580 must pair them with standard roof deck and fastening materials. Hence most have many different tests performed and results reported accordingly.

When reviewing metal roofing options, it is comforting to know that most manufacturers have tested their products and designed them to meet or exceed minimum requirements. To find out more about tested results of products you may be considering, contact your local MBCI representative or see the MBCI website and select the “testing” tab under a selected product.

Find a sales representative