Choosing Metal Roofing Types

All metal roofing is not the same. There are different profiles in different shapes for different reasons and to suit different performance needs. How to choose? Here’s the process that metal building engineers go through at MBCI to zero in on the most economical selection that will still meet the performance requirements of a particular metal roof project.

Snap Together Trapezoidal Panels

Offered by MBCI under the name Ultra-Dek®, the trapezoidal shape is among the best for channeling water off of the roof. However, because of this shape, it is most appropriate for typical sloped roofs with single plane roofs areas free of valleys or hips. It’s snap together installation makes it quick and easy to install economically with wind resistance capabilities adequate for many situations. It also carries basic air leakage and water penetration testing approvals.

Mechanically Seamed Trapezoidal Panels

For roofs that require a higher degree of performance than snap together systems can provide, MBCI Double-Lok® panels can be considered. The mechanically field-seamed, trapezoidal legs provide higher wind and water resistance with test results to satisfy UL-90, FM ratings, and Miami Dade County approvals. This makes them ideal for many industrial, commercial, and architectural roofs without hips and valleys that are subject to higher wind and rain demands. While the material cost for the panel is the same as for the Ultra-Dek®, there is more labor cost due to the mechanical field-seaming compared to the snap together installation. The Double-Lok® panel is also used often for retrofit installations over pre-existing metal roofs either to update the roof or to provide additional insulation. In either case, there is no need to disrupt the existing roofing or structure below allowing for a very cost-effective solution. Check with MBCI on the details of how to properly do a retrofit with these panels though to be sure things work out as intended.

Vertical Legs with Mechanical Seams
BattenLok
Regardless of which metal roofing type you choose, they all use high grade steel in standard gauge thicknesses and can be specified in many colors.

In cases where the trapezoidal legs aren’t appropriate or desired, then vertical leg, standing seam metal panels are the next logical choice. The MBCI BattenLok® HS system uses 2” tall legs that are mechanically field-seamed once along each panel joint to create a high strength, structural standing seam roof system that can be installed directly over purlins or bar joists – no additional solid substrate is required. It is also capable of transitioning from roof to fascia with the use of accessory seam covers.

Double Seamed Vertical Legs

In cases where very rigorous weather conditions may be encountered, the MBCI SuperLok® roof panels provide the highest degree of roof performance. While the manufactured SuperLok® roof panel is essentially the same as the single seamed BattenLok® panel, the profile is modified slightly to allow for standing seams to be rolled over twice, thus creating a stronger, thicker seal between adjacent panels. Once again, there is no difference in the material cost between the two, but the added field-seaming step will obviously add to the labor cost of this roof choice. Nonetheless, that can be a small price to pay for the higher performance and added peace of mind that the system offers.

While we have pointed out the differences between these four different metal roofing choices, note that there are some basic similarities too. They all use high grade steel in standard gauge thicknesses and they can all be specified in the same wide choice of colors. They are all offered in multiple panel widths, although check with the manufacturer to be sure the width you prefer is available for the specific panel selected. They all can be used for low slope applications down to ¼” per foot except for the retrofit solution which requires a 3:12 pitch. Finally, they all do have some minor variations in the profile which can help with the final desired appearance of the finished roof on the building.

To find out more about the differences in roof deck types and how to choose the best ones for on a metal roof that you are involved with, contact your local MBCI representative, and sign up for our newsletter to subscribe to our blog.
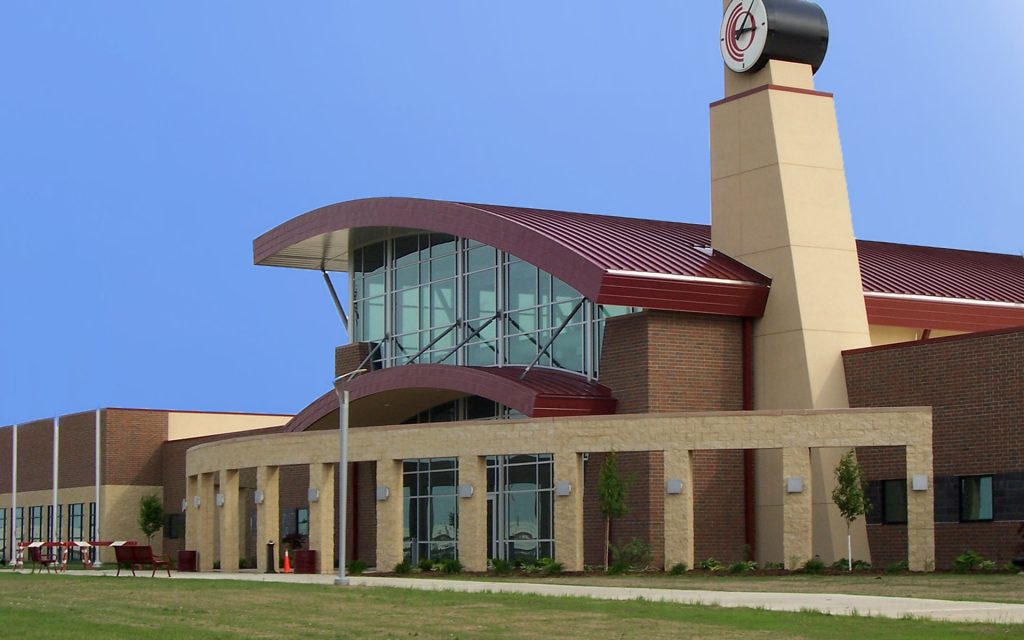
 

Nice Curves! Stunning Architecture with Curved Roofing and Walls

Breaking away from simpler panels, more and more architects are experimenting with arched and curved metal roofing and wall panels to upgrade their designs. This enables designers to incorporate exciting elements like concave and convex curving, not as feasible with other cladding materials.

Combined with unique angles, increased edge finishing options, appealing gutter options and greater compatibility with shingle types, architects now have access to a greater assortment of mix-and-match options.

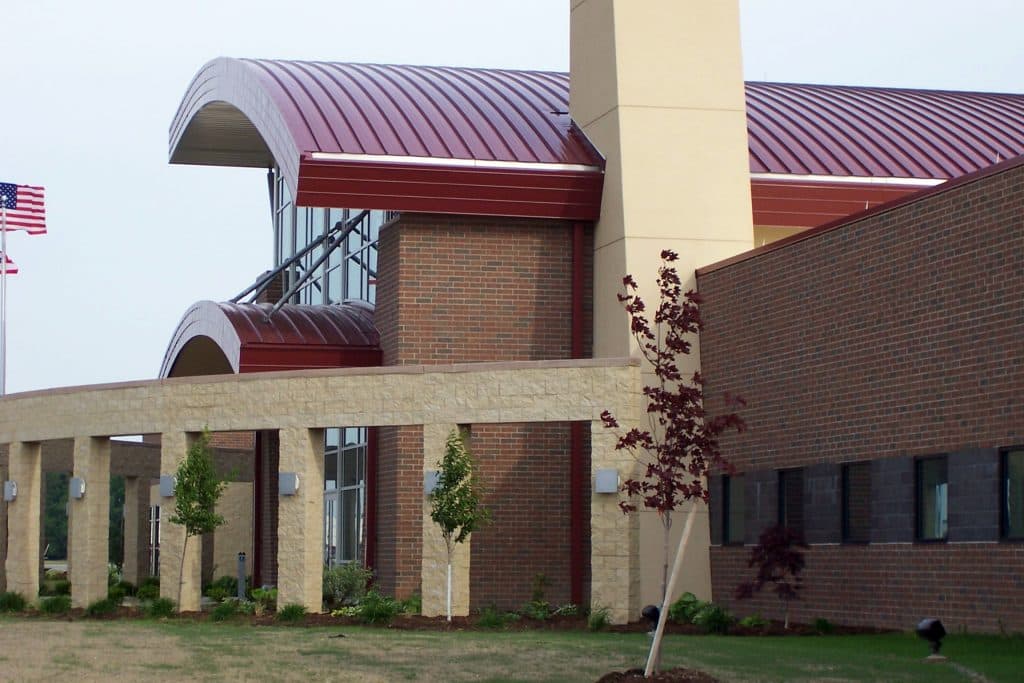
For example, at Owens Community College in Findlay, Ohio, a regal red, double-curved canopy crowns the curtainwall with 15,500 square feet of 22-gauge curved metal roof panels. Designed by Rooney Clinger Murray Architects, the structural roofing panel system, fabricated by MBCI, is ASTM tested for air infiltration and water penetration, and incorporates a 2-inch tall standing seam that was field seamed during the installation process. The contractor, Charles Construction Services, won the American General Contractors (AGC) Build Ohio Award for “New Construction Under $10 Million.”

Owens Community College
For Owens Community College, the Curved BattenLok® metal panels in red accentuate the arch of the campus, making it the focal point of the building.

Another noteworthy curved design example is the Central Los Angeles Area High School #9, designed by HMC Architects. “Metal enabled us to clad buildings of different geometries, including curved geometries, in one material, while also giving them a special appearance,” reported Kerstin Kohl, spokesperson for the project’s design architect, COOP HIMMELB(L)AU, in a Metal Construction Association case study, Steeling Art for Students.

Using CAD and BIM for Curved Metal Panels

For designing and fine-tuning curved metal creations, the latest CAD and BIM features are key tools for architects.

In creating the “geometry that has been freed from the relentlessness of the orthogonal layout,” as described by Mark Dewalt, AIA, principal at Valerio Dewalt Train, in a recent article in Metal Architecture magazine, New Trends in Metal Architecture, designers are using CAD in shop drawings to support unique façade fabrication.

“The use of computer design to warp and twist and perforate will give metal greater longevity, added Kevin Marshall, AIA, LEED AP BD+C, associate architect, Integrated Design Solutions.

Similarly, BIM software is further supporting enhanced compatibility with metal roof and wall designs with newer features such as automated light gauge steel wall framing work and the ability to more easily configure supporting structures, openings, complex L or T connections and service hole positions while providing photorealistic renderings so that the client can see exactly how their building will look once built.

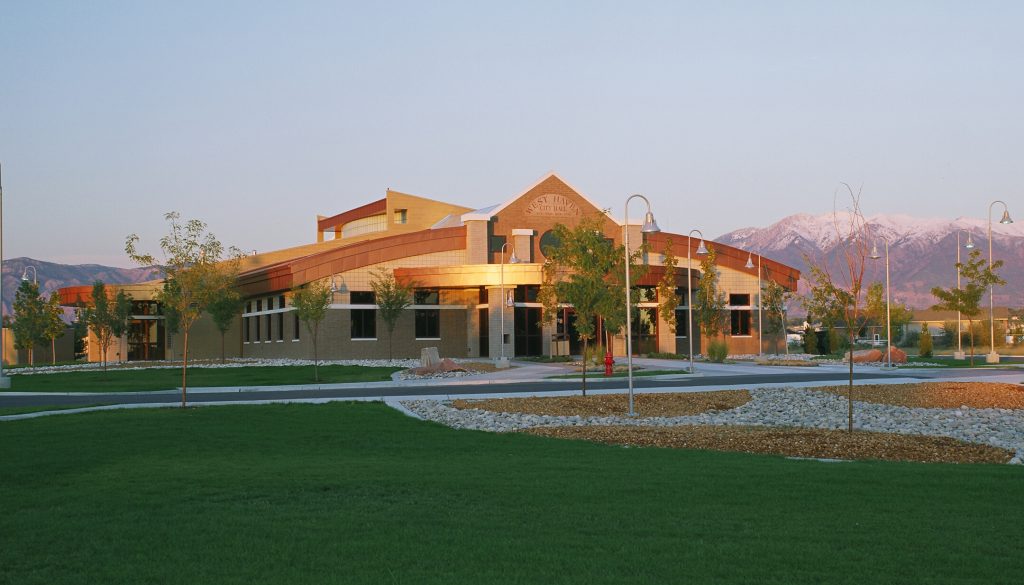
West Haven City Hall
West Haven City Hall combines MBCI’s Curved BattenLok® in Copper Metallic with Artisan® Series and Flat Sheet.

Ensuring a Tight Building Enclosure with Curves

As with any roofing type, designing and installing a tight building enclosure for curved roofing and walls is essential for delivering a high performing building.

For starters, architects must choose an appropriate vapor retarder, especially in cooler climates and interior relative humidity levels of 45 percent or greater. Also, buildings with high humidity interiors and construction elements that may release moisture after the roof is installed–such as interior concrete and masonry, plaster finishes and fuel-burning heater– require special considerations when choosing vapor retarders.

With utility clips, some curved panels will lay tight to the wood deck, but if tin tabs are used to attach the moisture barrier to the wood deck, then they will need to be covered to prevent the tabs from rusting the back side of the panels. Similarly, plastic washers may not be the best option as they run the risk of impacting the panels, resulting in undesired aesthetics. Rather, peel and stick membranes are a preferred underlayment because they eliminate the potential of underlayment fasteners penetrating or dimpling the panels.

A Savvy Look for Design

Whether it’s wavy, circular or some other exciting soft geometric shape, curved metal roofing and walls open up all kinds of new design possibilities. Out of the box, literally, architects are actively producing exciting, eye-catching creations with these welcomed capabilities.

Proper Care and Usage of Roof Seamers

As more standing seam metal roofs are being installed than ever before, it is imperative for roofing contractors to have the proper tools when quoting jobs. Remember, a properly formed seam is important for aesthetics, weathertightness and wind uplift. With the right tools in hand for these complex installations, you can get the job done faster, better and with greater cost efficiency than your competitors.

Know Your Type

Seamer use depends on the type of metal standing seam panels on the project: double lock seam, symmetrical seam, one-piece snap-lock interlock and two-piece snap-lock interlock. You will need to identify the type of panel in order to choose the right seamer and confirm that you are using the right seamer for the job. The double lock seam, also known as a Pittsburgh seam, is double-folded, meaning the finishing seam is 180 or 360 degrees. This applies to MBCI’s Double-Lok® and SuperLok® panels. A single-lock seam is 45 or 90 degrees, such as MBCI’s BattenLok® HS and Curved BattenLok®.

Follow Manufacturer Instructions Explicitly

Adherence to the field manual instructions is critical to ensure proper installation that will not result in damage to the seamer and/or panels. It is critical to carefully read the manufacturer’s manual thoroughly before beginning the seaming operation, whether renting or buying the equipment. Not only will this give you the best possible result, but it can also save you the headache of incurring costs of replacing or repairing the seamer due to misuse.

Step-by-Step Guide to Pre-Seaming

  1. Locate field manual in the seamer box and review operational procedures.
  2. Locate power source and check against power requirements in field manual.
  3. Check seams for proper engagement.
  4. Clean dirt, debris and excess sealant from seams and panel surfaces to avoid interfering with the seaming operation.
  5. Panels should be seamed with an electric seaming tool as panels are being installed.

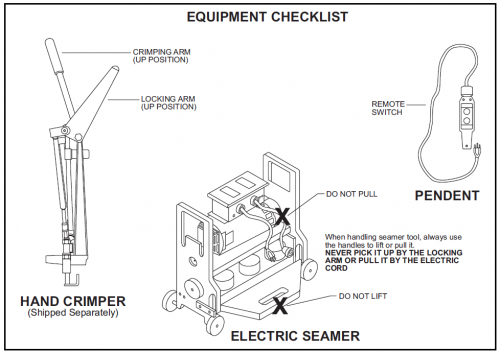
Seamer Equipment Checklist

Keys to Seaming Success

  1. The seamer should be supplied or recommended by the manufacturer. Don’t assume another manufacturer’s seamer will work on the panels you are installing. For example, other manufacturers may have a panel similar to MBCI’s BattenLok® HS but that doesn’t mean that an MBCI seamer would work on any of those panels. It is important to use the seamer recommended for the specific product. It must be the proper seam for the engineering. That is if you don’t seam it properly, the manufacturer won’t know if its load charts and tables are accurate.As previously stated, carefully read and follow seamer instructions for proper results. You will need a properly formed seam to ensure you achieve the desired aesthetics and weathertightness as well as mitigating risk from wind uplift. The seamers are miniature roll formers and need to be installed in a very specific way.
  2. Take care of the seamer—don’t leave it out in the rain or in other weather conditions where it could suffer damage.
  3. If not forming seams properly, stop immediately and call the manufacturer or company providing the seamer
  4. If renting, when returning the seamer make sure all equipment is returned, i.e. hand crimpers or hand seamers.

For more information on MBCI seamers, please review the manuals for specific panel types.

Find a sales representative